Parents have the ability to log into the Community Portal and update their details, as well as any students linked to them. These details are not saved into the database until they are accepted by a staff member. This article will run through the process of doing this.
Synergetic Test
Please note that screenshots in this article have been taken in 'Synergetic Test'. Verifications will need to be done in 'Synergetic'
Accepting / Rejecting updates.
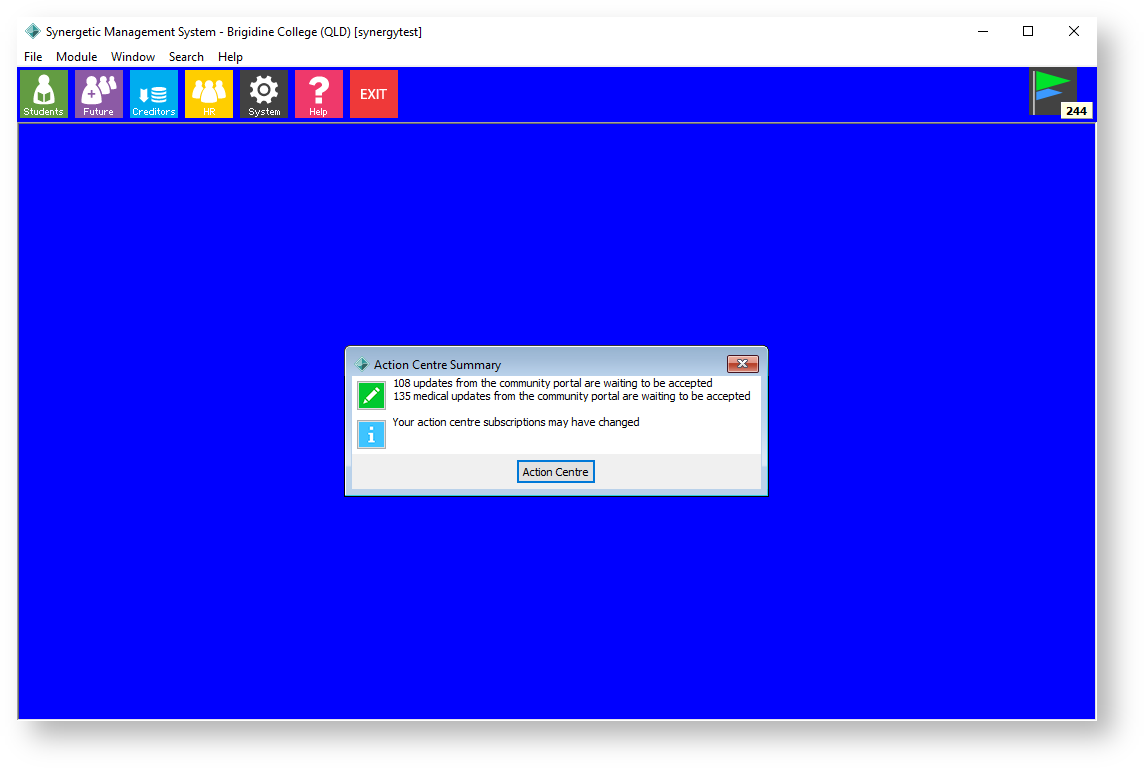
Open Synergetic and click on the 'Action Centre' button in the top right (flag). This will open the 'Action Centre Summary'. If there are changes that are waiting for verification they will appear as a text line item as shown below. To start reviewing the updates, click on one of the lines ending with 'from the community portal are waiting to be accepted' to launch the 'Action Centre'.

Action Centre Interface
Before we begin accepting and rejecting update submissions we suggest adjusting the interface as outlined in this article under Action Centre
- Starting from the top of the list, you can begin to review the details of each update and accept or reject the changes appropriately. Below is an example of a Portal details Updated item waiting for verification. At the top, the item we have selected is in a shade of blue, below the list shows all the fields that have been updated / added. The screenshot below shows how we can relate list items up the top with the item selection at the bottom.
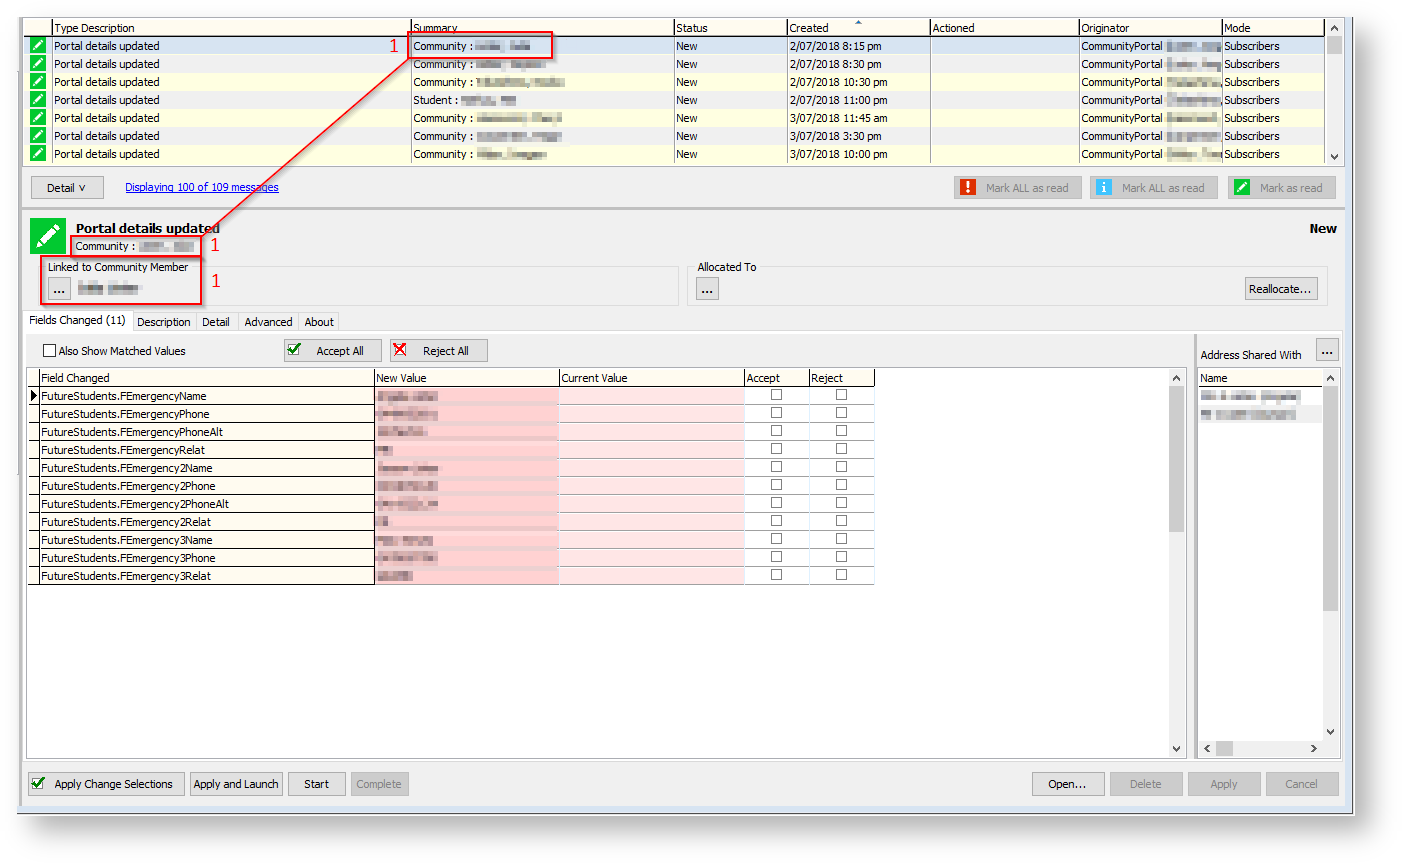
From left to right the columns shown below are:
Field Changed - This shows the field that was changed, it is structured as
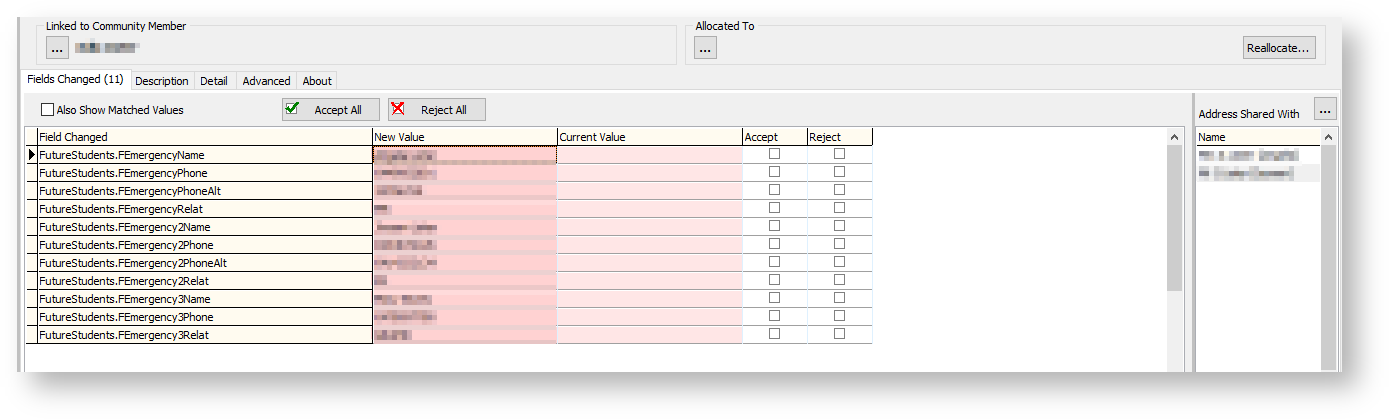
AreaChanged.FieldChanged, e.g.FutureStudents.FEmergencyNameshown below.New Value - This is the value that has been entered by the parent on the Community Portal.
Current Value - This is the value that is currently live in the Synergetic database (it will be blank if the information has not been provided in the past).
Accept - Check mark to accept this submitted value.
Reject - Check mark to reject this submitted value.
Examples
Example 1 - Basic data submission
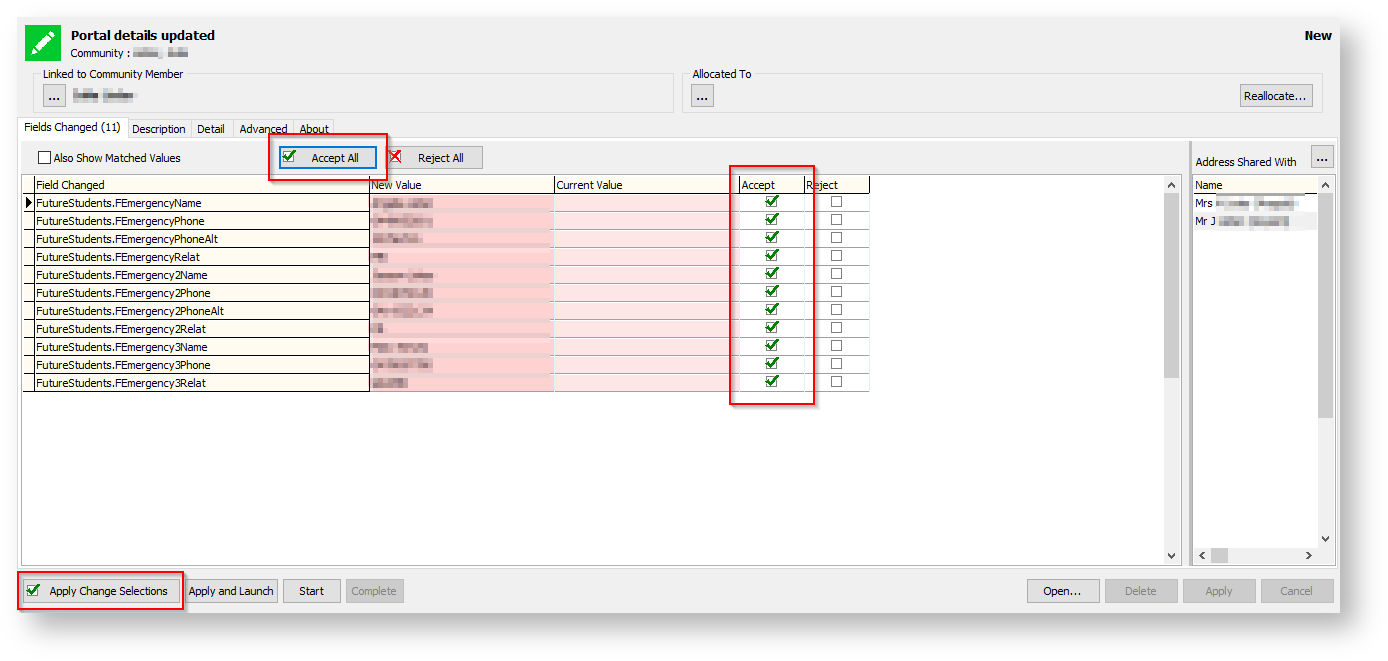
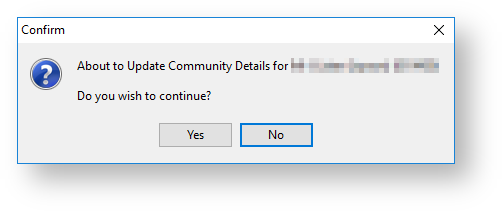
- In this example we can choose 'Accept All' and then choose 'Apply Change Selections' to update these values. After we hit apply we will get a confirmation pop up, select 'Yes' to continue.
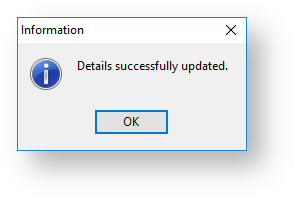
- Once we have continued we will get a confirmation message saying 'Details successfully updated'. This will remove it from our top list. To go to the next item we may need to re-select the top item in the list, again we can confirm which item we are on with the blue highlight.
Example 2 - Data submitted multiple times
- In the following example we have fields that have been updated twice. To continue, we need to accept or reject each of the items in the list, however we cannot accept the same 'Field' twice in one Portal details Updated item. If we were to 'Accept All' and choose 'Apply Change Selections' we would get an error message. Fields in yellow are the most recent items.
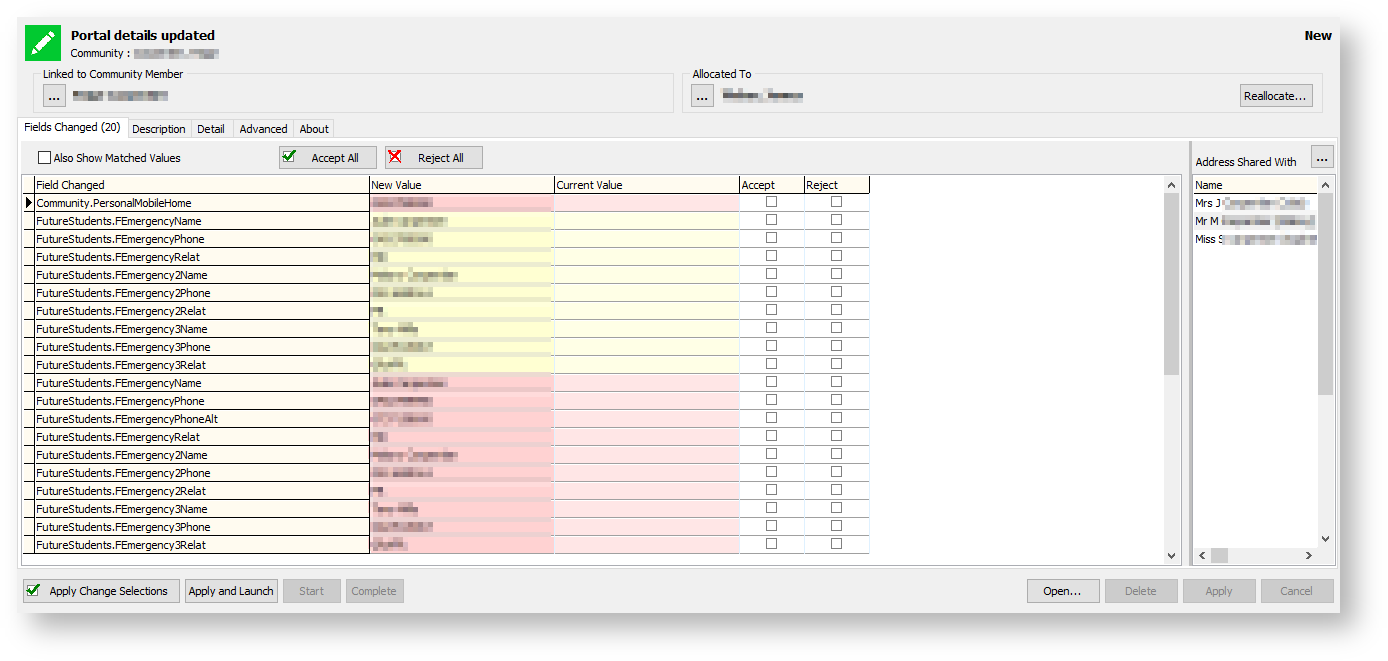
- To complete a Portal details Updated item like this we will need to 'Accept' the duplicate items that are marked in yellow and 'Reject' those in red. You will notice we have selected 'Accept' on an item that is red rather then rejected it (First line 'Community.PersonalMobileHome'). This is because it does not duplicate another item in the list and we want to save this value. Once we are happy with our choices we will choose 'Apply Change Selections'
