...
Using "Cover/Slip/Designate" function to print a booklet with a front/back cover printed on special paper and logo printed on back instead of inside.
Step-by-step guide
- Ensure the document has a blank page before the last page, this is important if you are wanting the last page to have content otherwise it will print on the inside.
- From the Printer Properties in the Detailed Settings tab select Cover/Slip/Designate from the Menu.
- Set the following options:
Tick Front Cover Check Box
Select from Input Tray drop down: Select the tray you will be putting the special paper in as your Front/Back Cover. In this case Tray 3.
Select from Print Mode drop down: One Side
Tick Designate/Chapter Check Box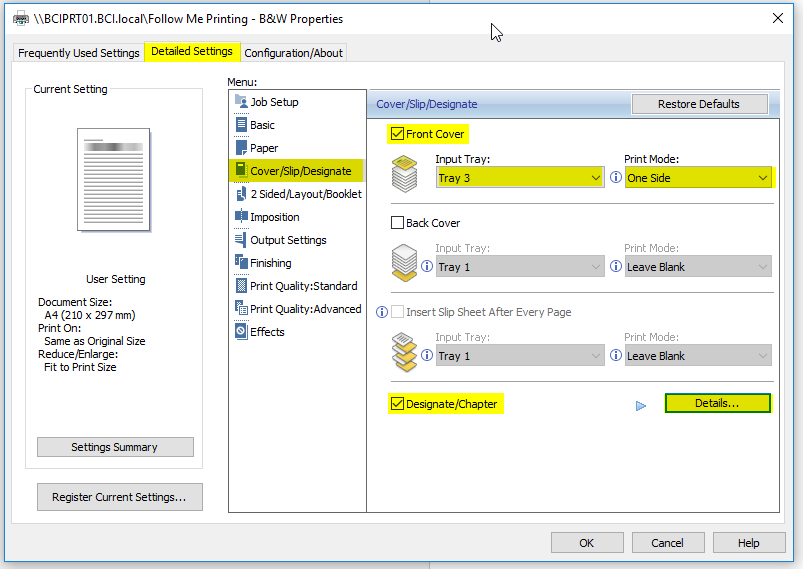
- Click Details... Button.
- Set the following options:
Enter Page Number: Enter the number of the blank page just before the last page. In this case page 16 was the blank/second last page .
Select from Print Mode drop down: Designate: Both Sides
Select from Input Tray drop down: Select the tray you will be putting the special paper in as your Front/Back Cover. In this case Tray 3.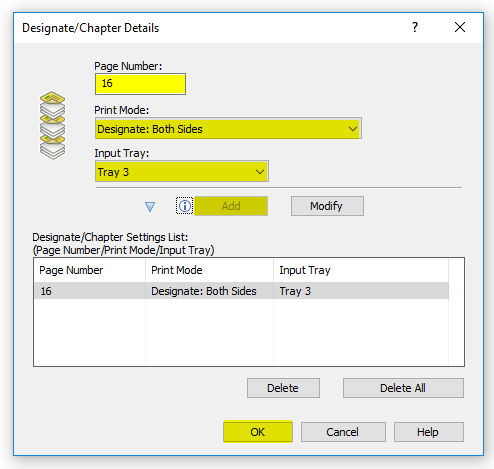
- As normal set any other desired options such as stapling.
| Info |
|---|
|
Related articles
| Content by Label | ||||||||||||||||||
|---|---|---|---|---|---|---|---|---|---|---|---|---|---|---|---|---|---|---|
|
...