Use thes instructions to check a file's version history from Microsoft Teams.
Checking a file's version history in Teams.
- Navigate to the file on Teams, and click 'Open in SharePoint'
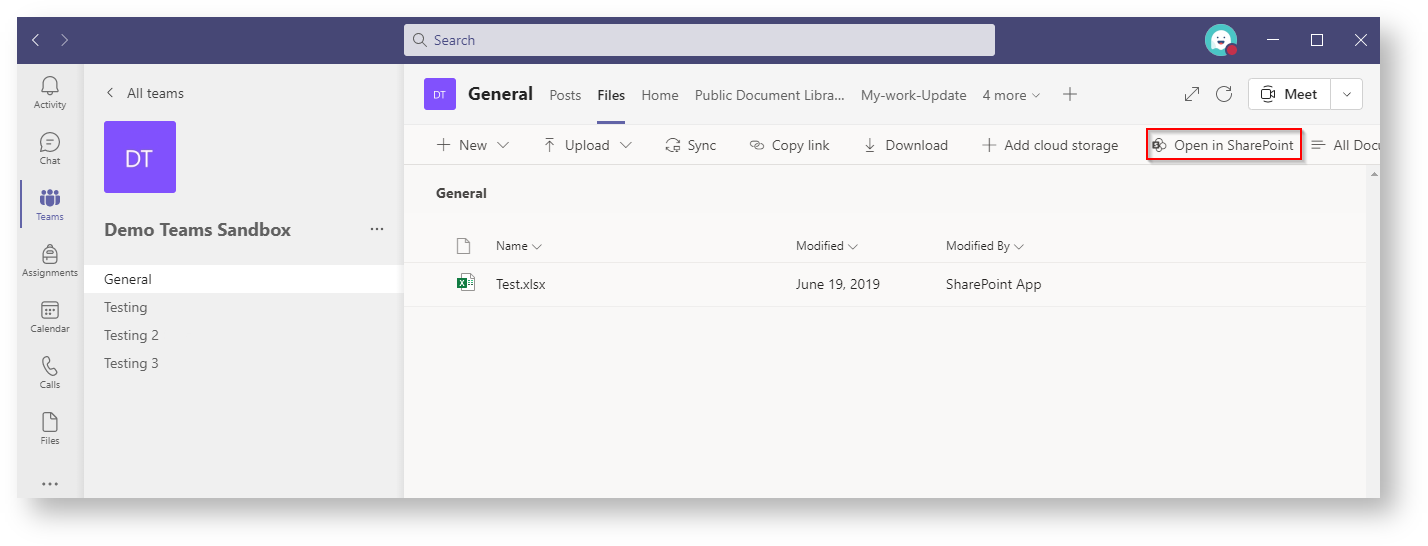
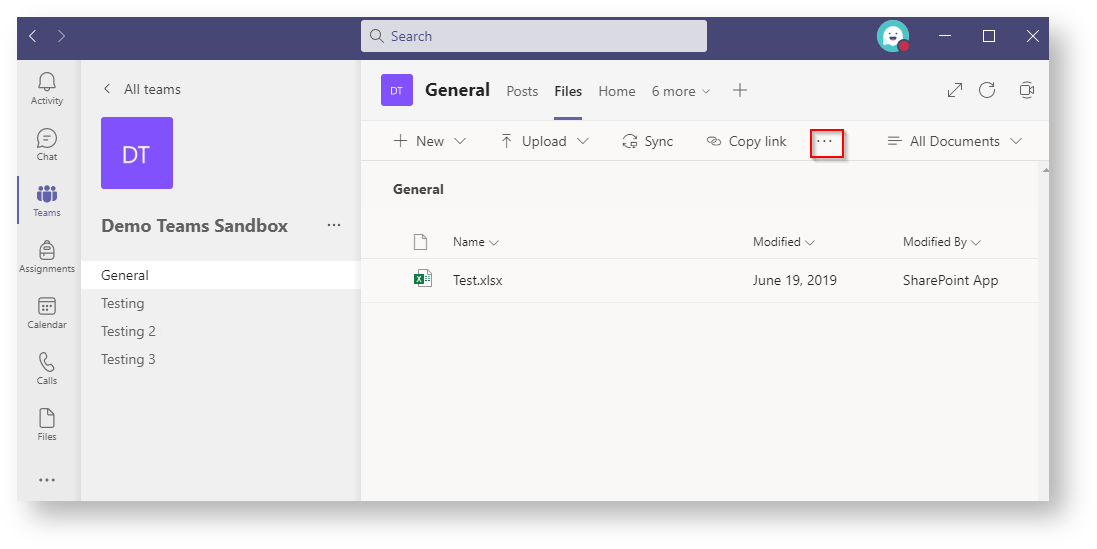
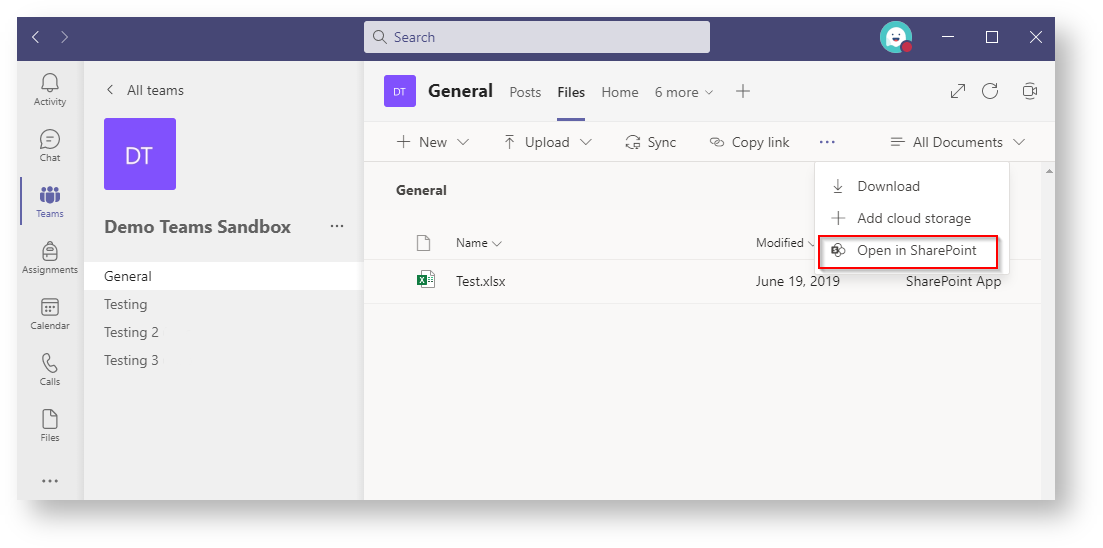
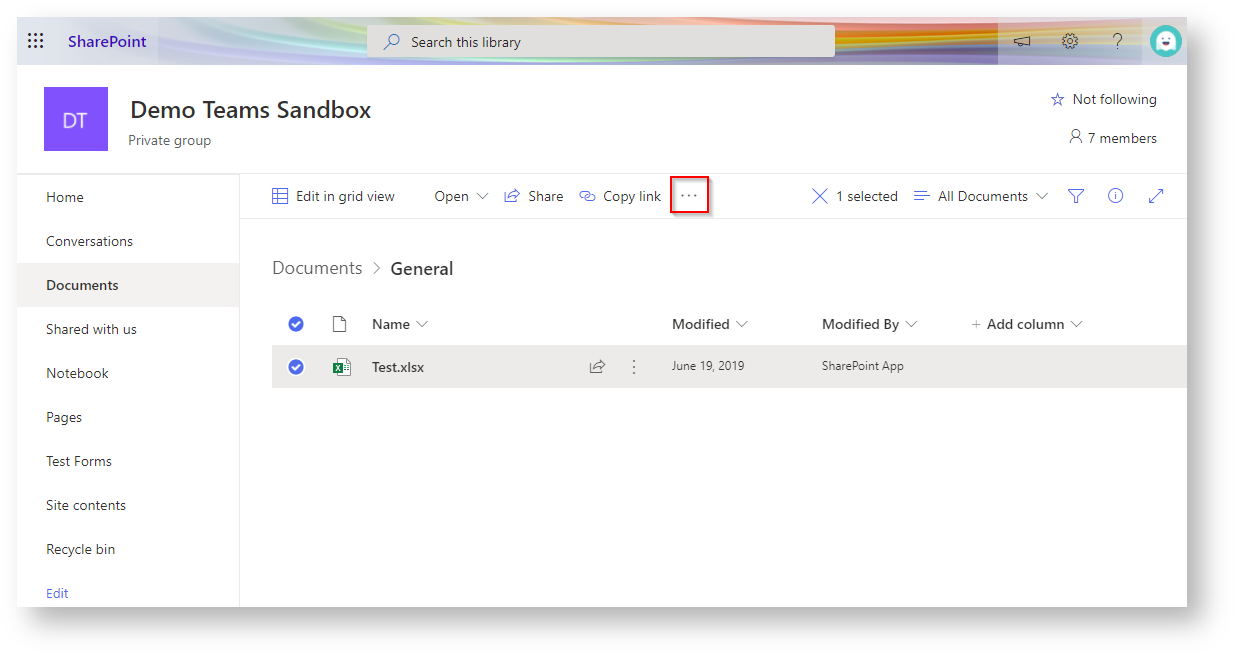
You may need to click the three dots in the ribbon bar to see the option.
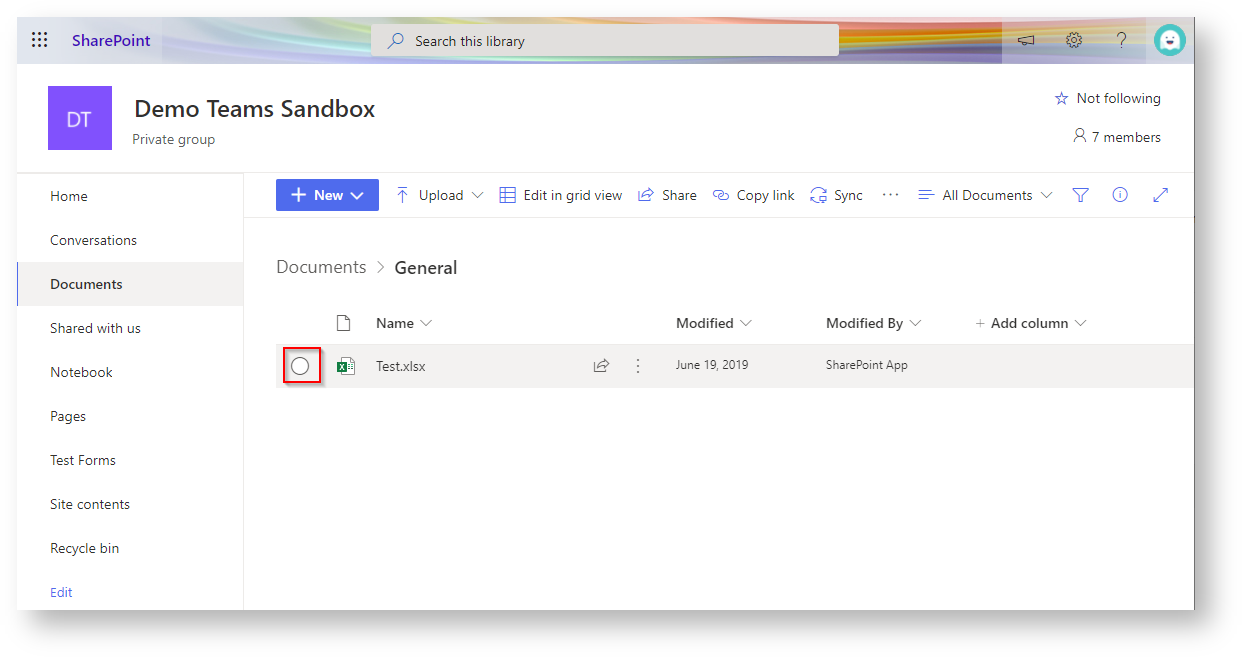
- Hover over the document in Sharepoint and then click on the circle to the left of the file name.
- Click on the three dots in the ribbon bar.
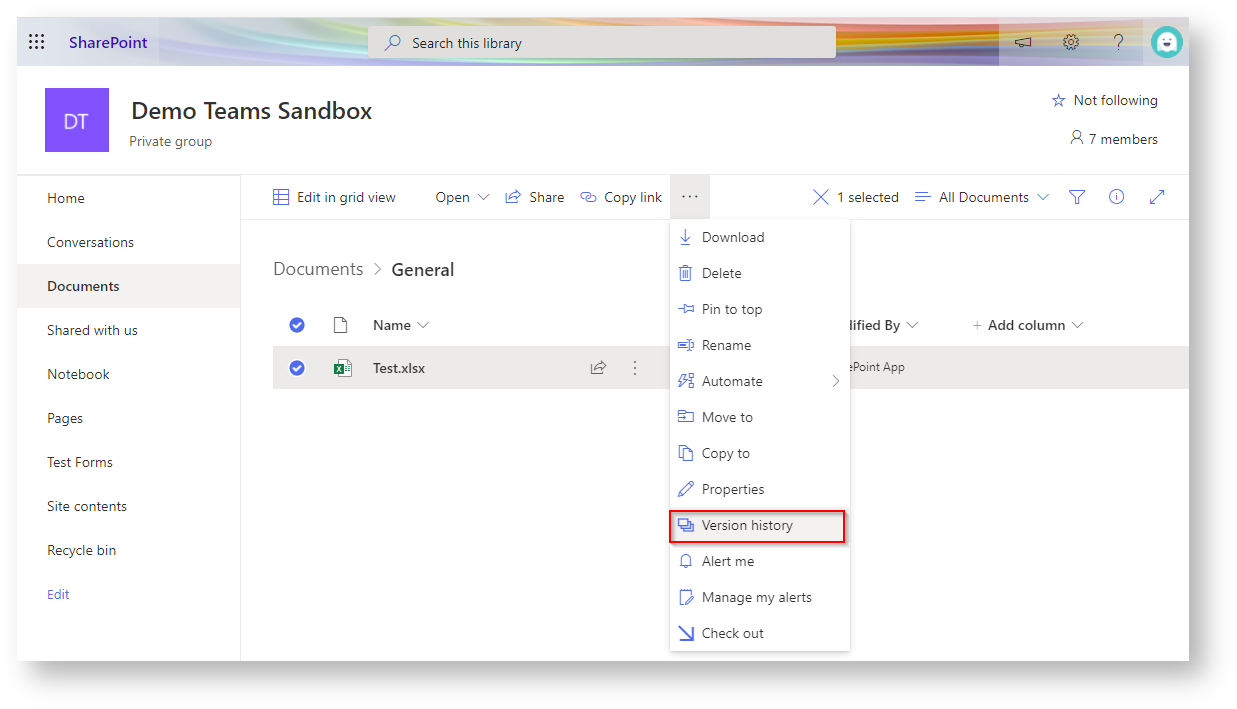
- Click on 'Version history'
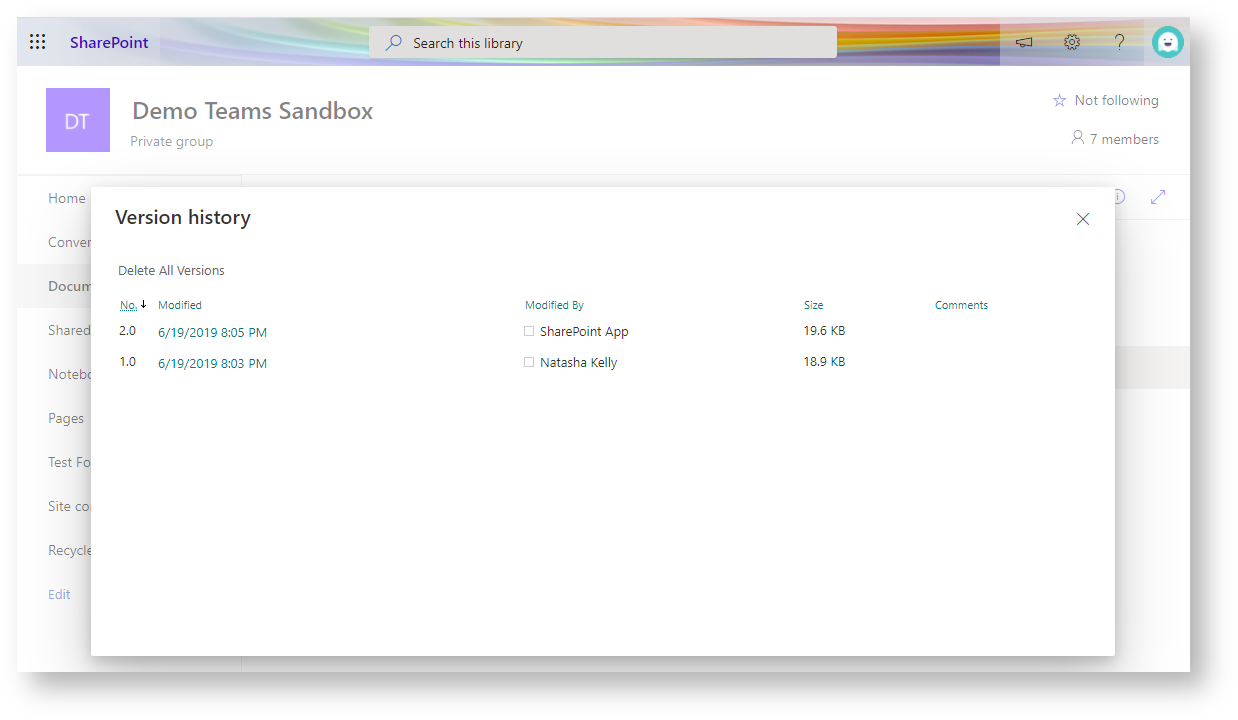
The window below will pop up
- Open a previous or current version by hovering over the date modified as indicated by the underline.
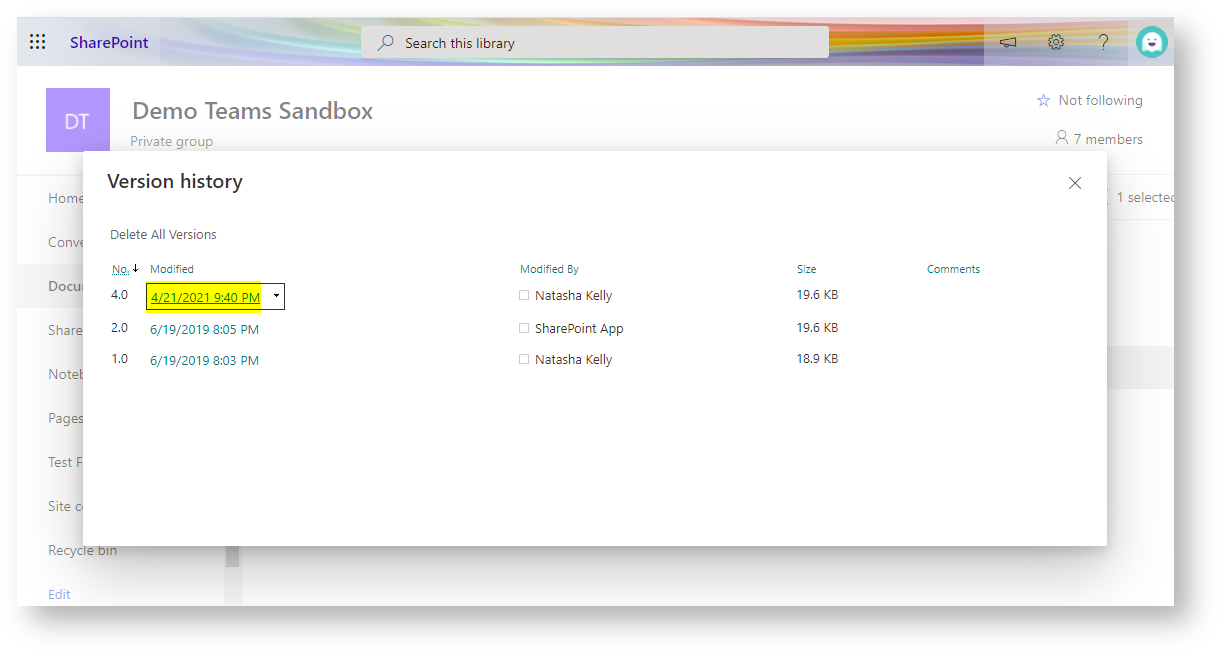
- Right-click and select 'Open link in new window'.
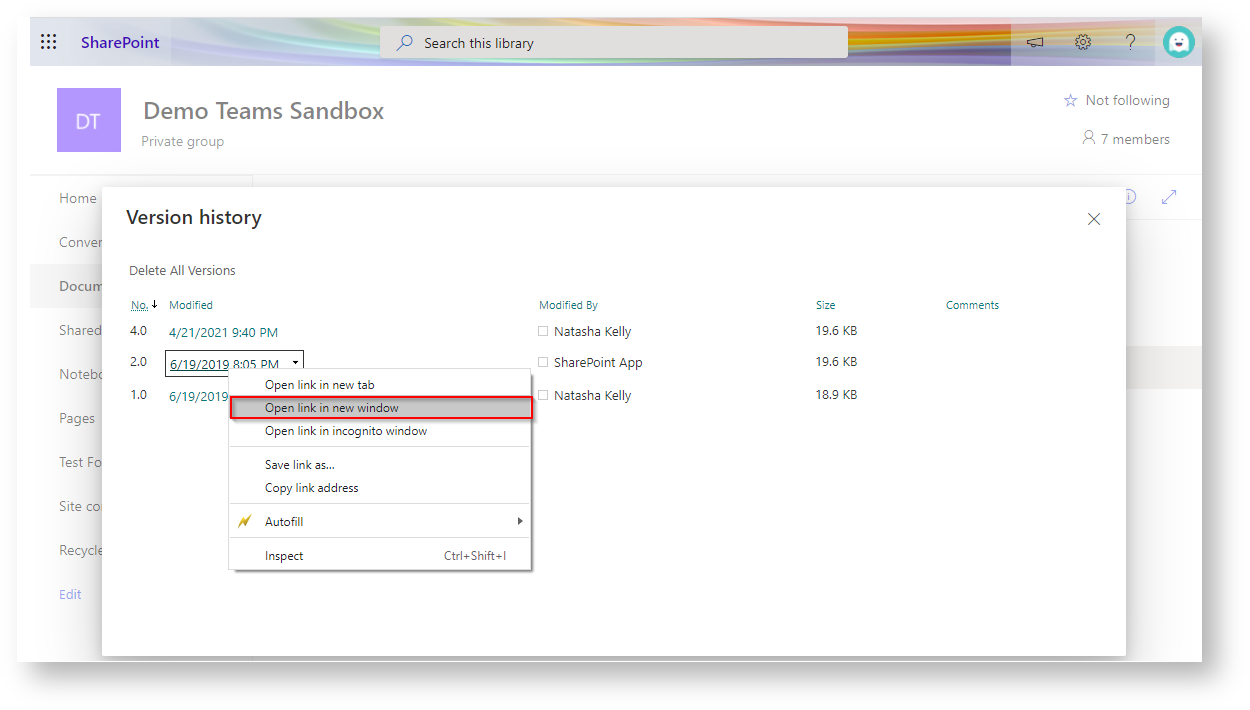
- Depending on the document type, the previous version will be either be downlaoded or opened in a new tab.
Review the document and if needed restore to a previous version.
Restoring to a file's previous version
It is recommended that you review the document contents before restoring the version.
- Navigate to the version history of the file.
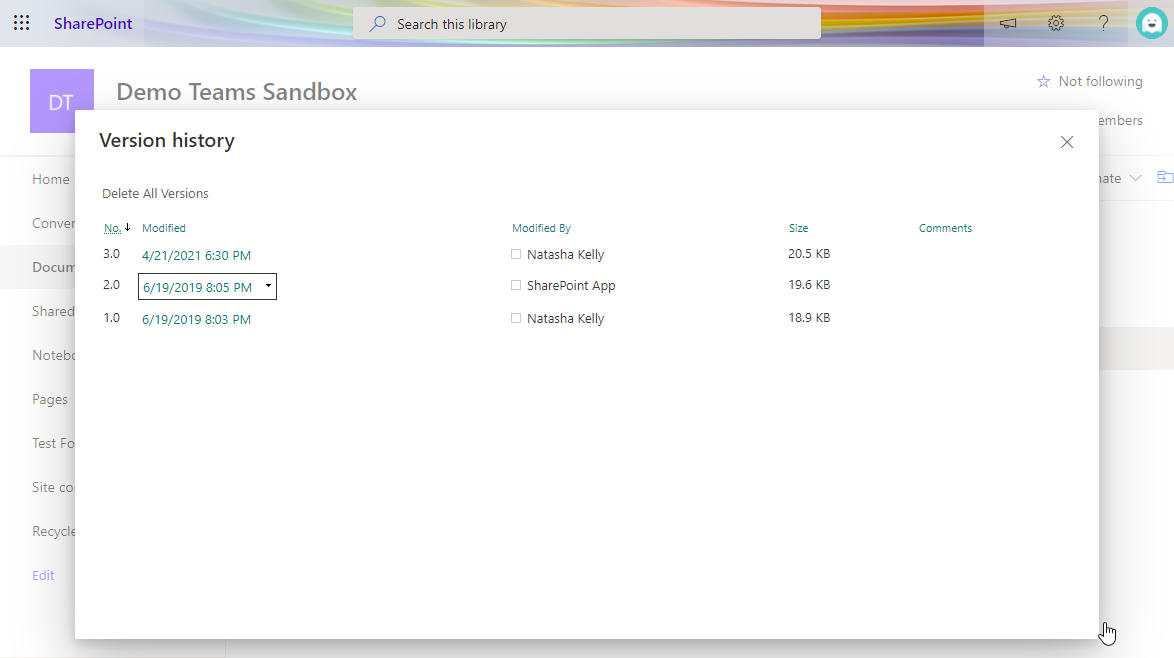
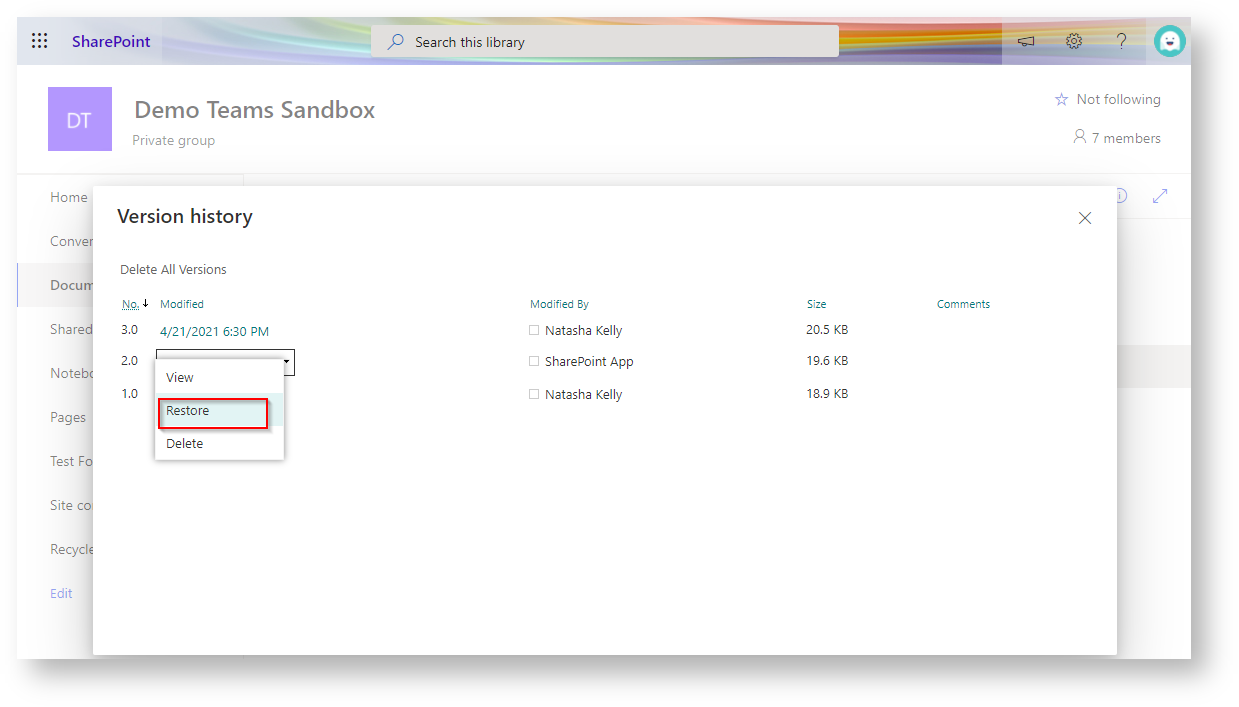
- Hover over the version you wish to restore to bring up the drop down options.
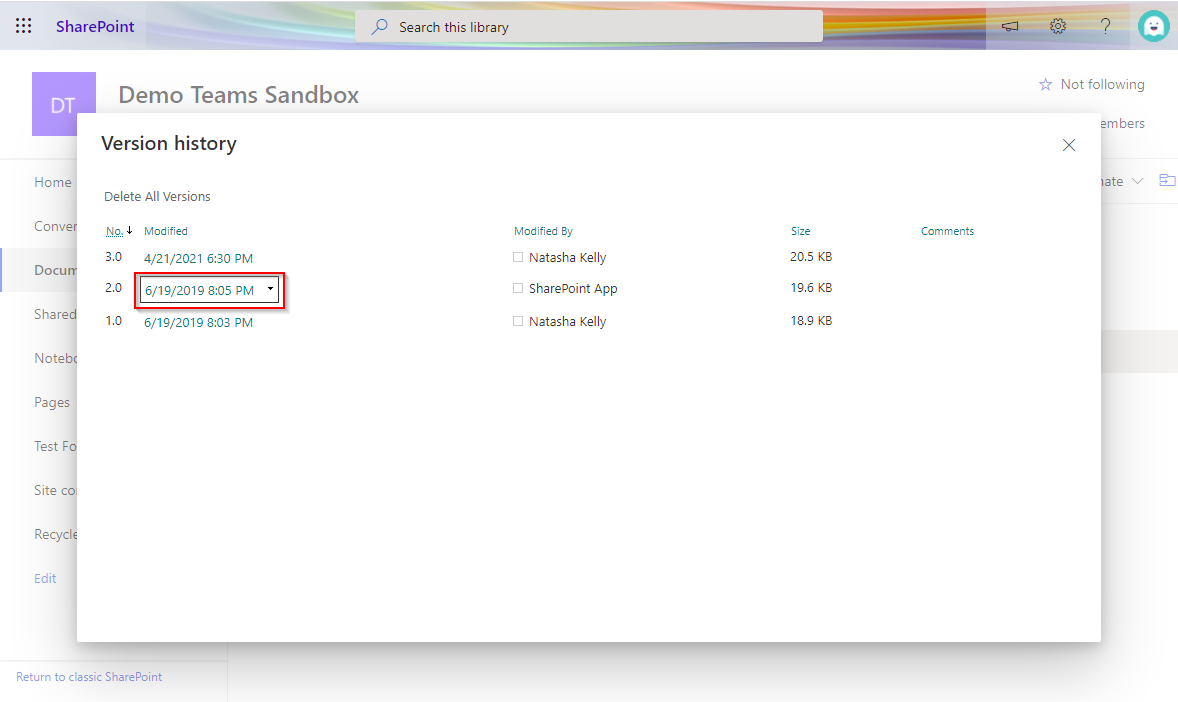
- Click the down arrow to view the version history options.
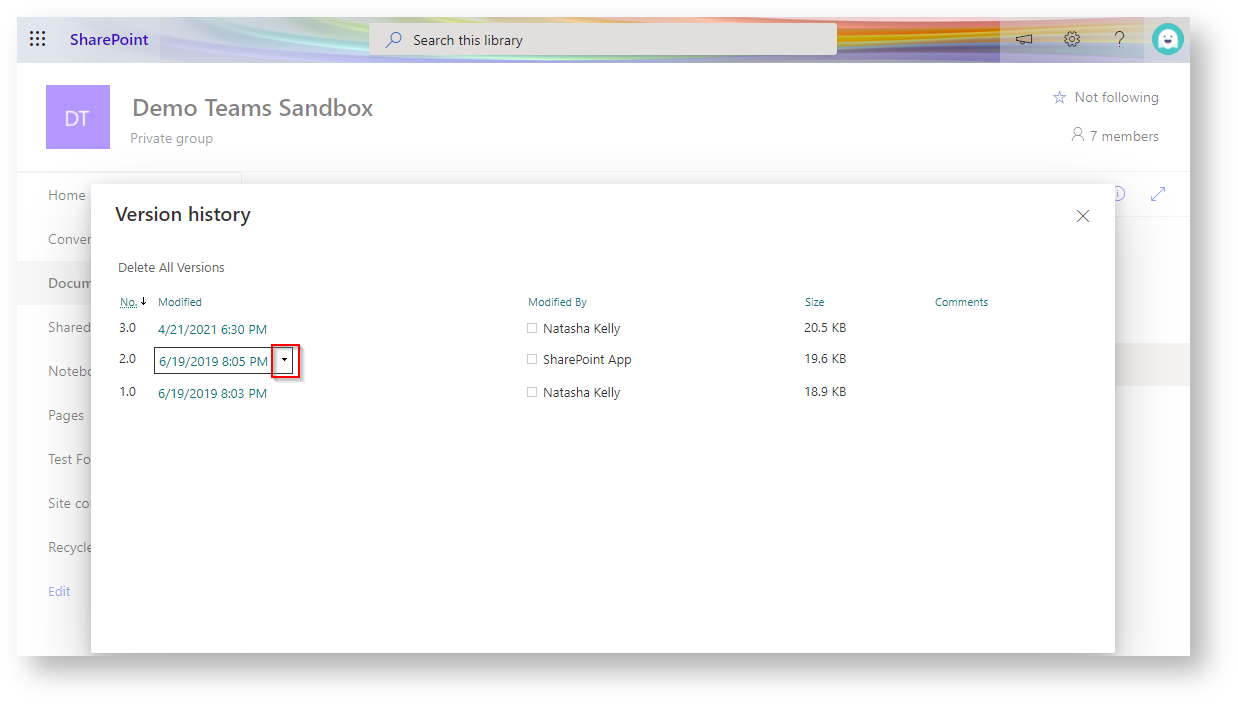
- Click 'Restore'.
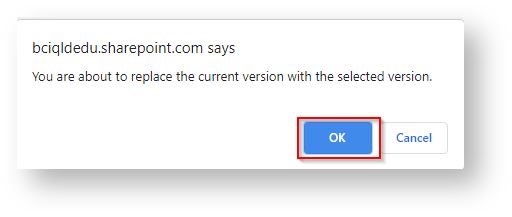
- The following pop up will appear, click 'OK'.
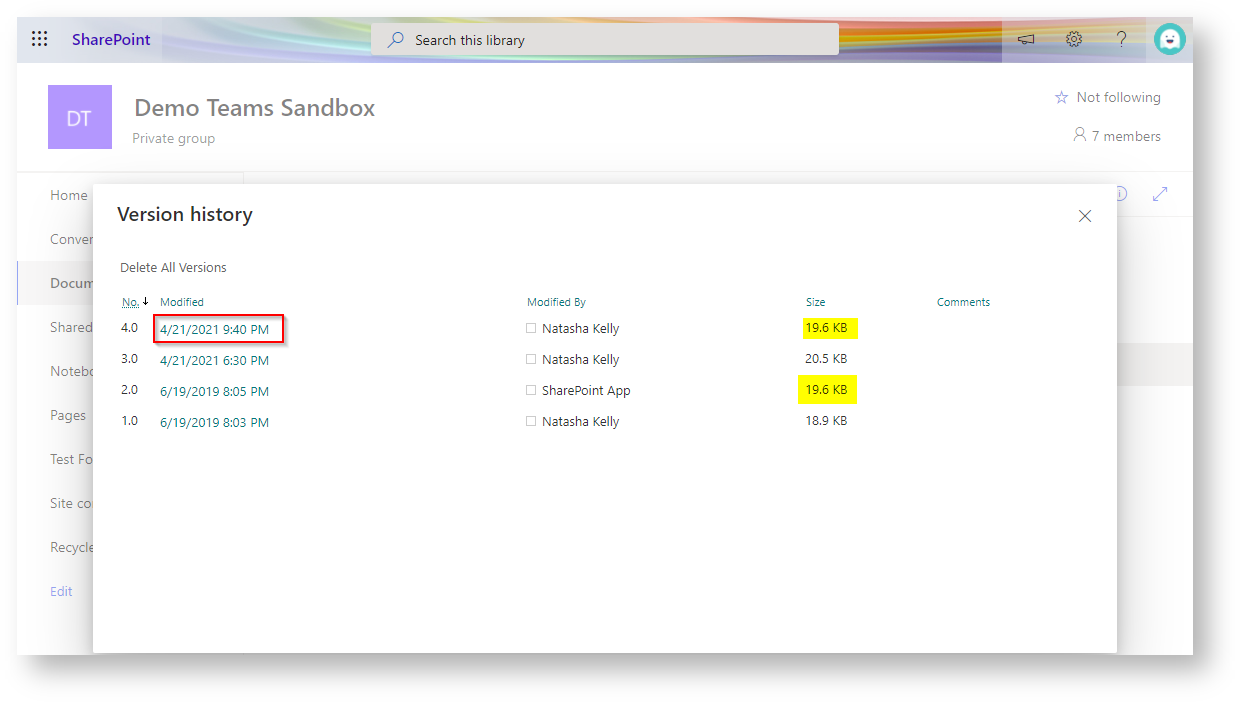
- The document is now restored to its previous version. This is indicated by another version in the list which matches the size of the document it is being restored from.
Related articles
Related articles appear here based on the labels you select. Click to edit the macro and add or change labels.


