Open the '16-MergedClass.docx' document (link to download at top of article.
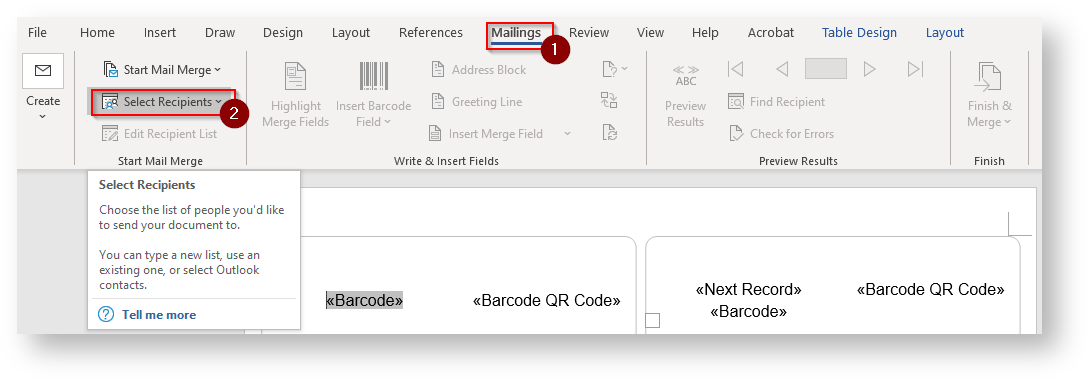
Click on the 'Mailings' tab in the ribbon bar, and click 'Select Recipients'.
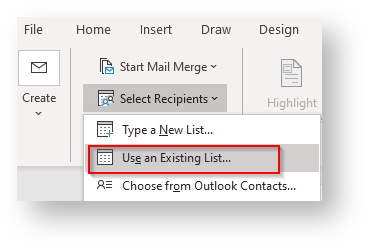
Select 'Use and existing list'.
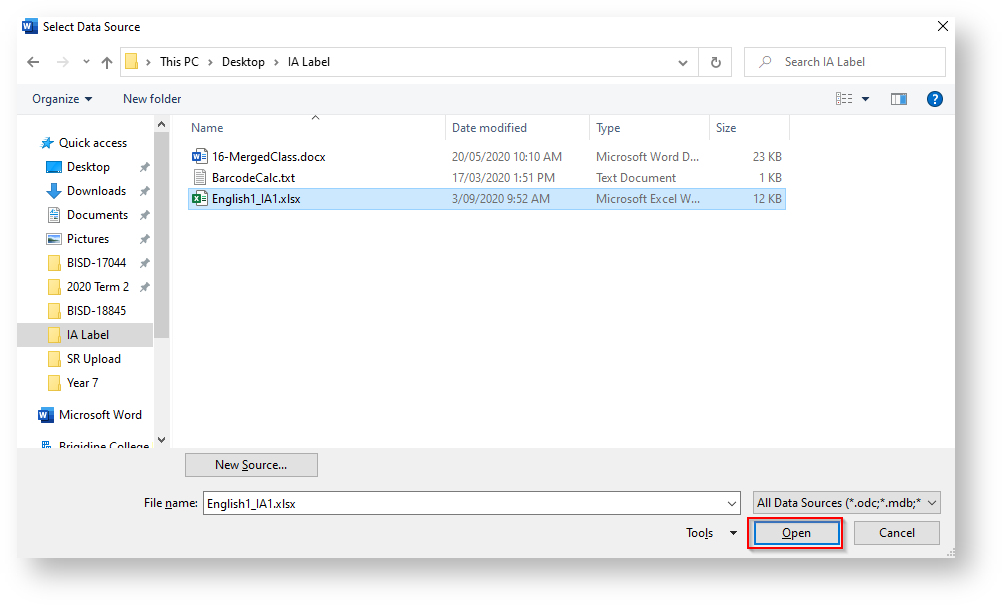
Navigate to the folder where you saved the excel file, then open the excel file.
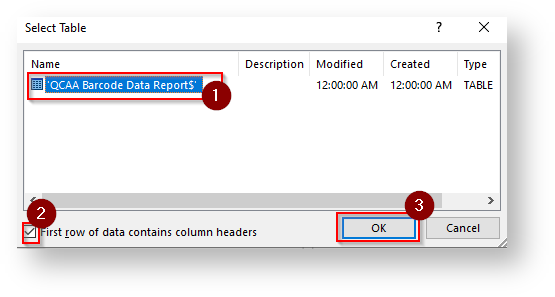
Select 'QCAA Barcode Data ReportS' from the list, ensure the 'First row of data contains column headers' is ticket and then click 'OK'.
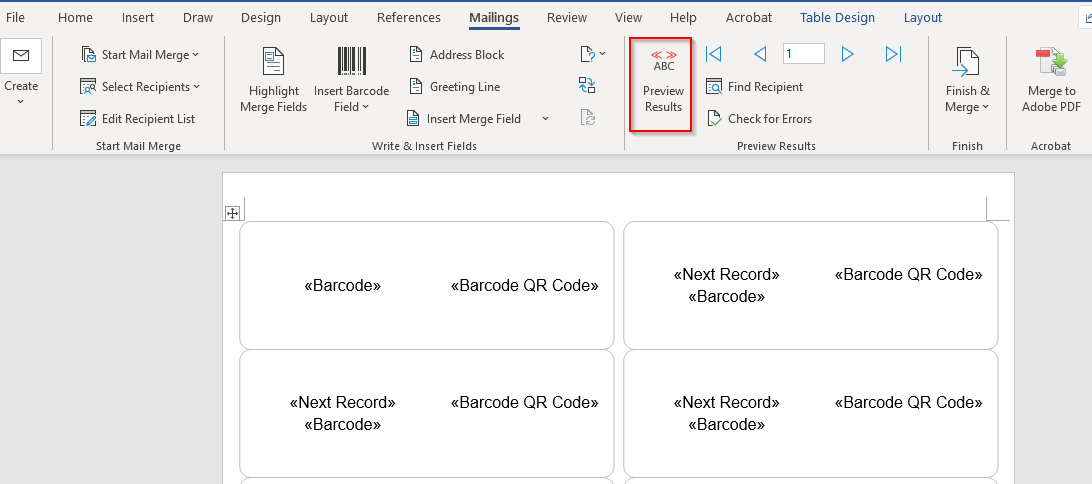
The entries will not be shown visually automatically, click the 'Preview results' to see the entries visually. Once applied the entries will be shown as below and the preview results button will be coloured in.
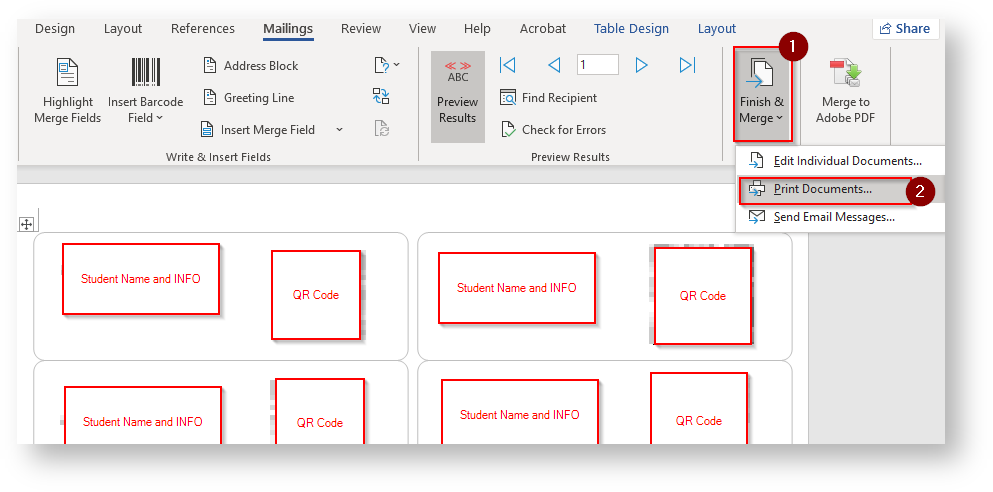
To print the document select 'Finish and Merge' then select 'Print document'
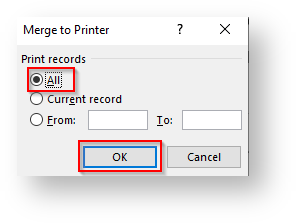
Ensure 'All' is selected then click 'OK'
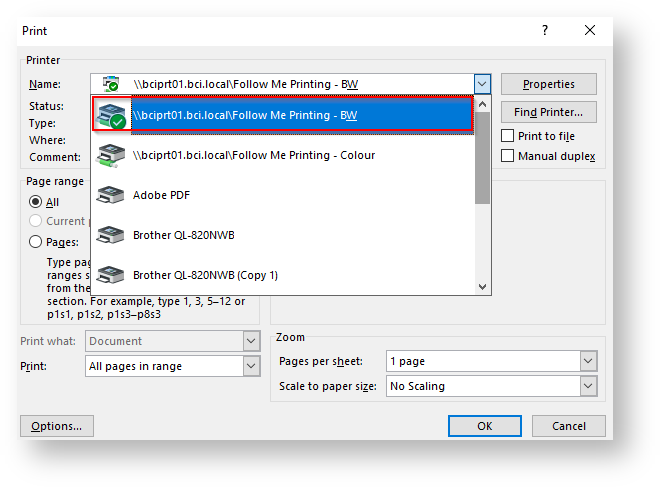
Select 'Follow me Printing - BW' from the drop down list. Image RemovedImage Added
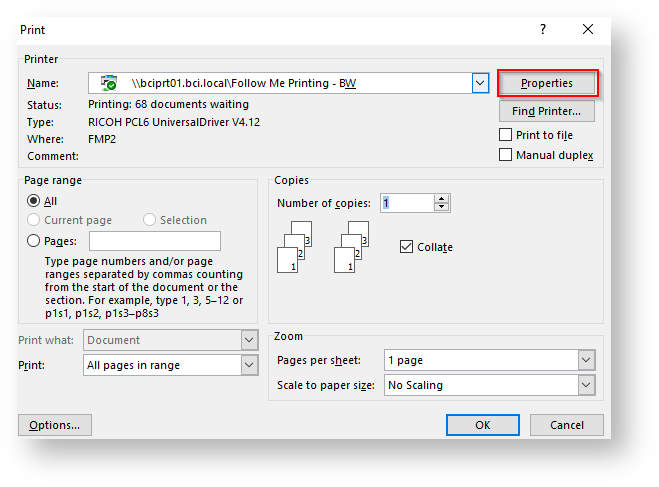
Click 'Properties' Image RemovedImage Added
Change 'Paper Type' to 'Labels' and 'Input Tray' to 'Bypass Tray', then click 'OK' Image RemovedImage Added
Click 'Print' and release the document as normal (note down the number of pages so you know how many to load), then load the label paper in the bypass and print from your desired printer.
Warning
Do not save the word document, just overwrite the data by selecting another recipient list when the data needs to be changed