When you're out of the office and unable to attend to your email, you can use the Out of Office reply feature in Outlook to send an automatic reply.
If you have exterior people contacting you, you will need to create both an 'Inside my Organisation' and 'Outside my organisation' reply.
Instructions
- Open the Outlook Web App.
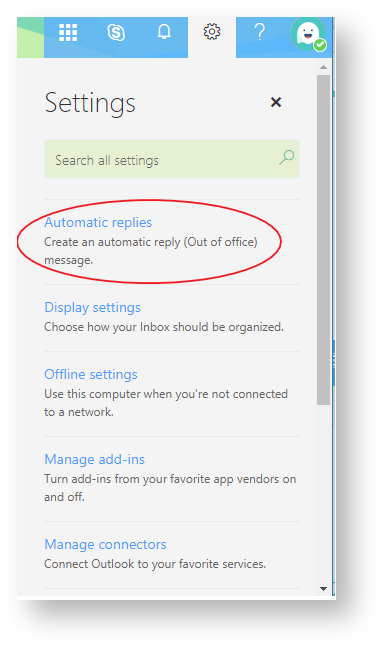
- Click the settings cog (located upper right hand of screen).
- Choose 'Automatic replies' on the panel that opens up.
- The following screen contains two sections, one for automatic replies to people inside the organisation and another for replies to people outside the organisation. (As shown below).
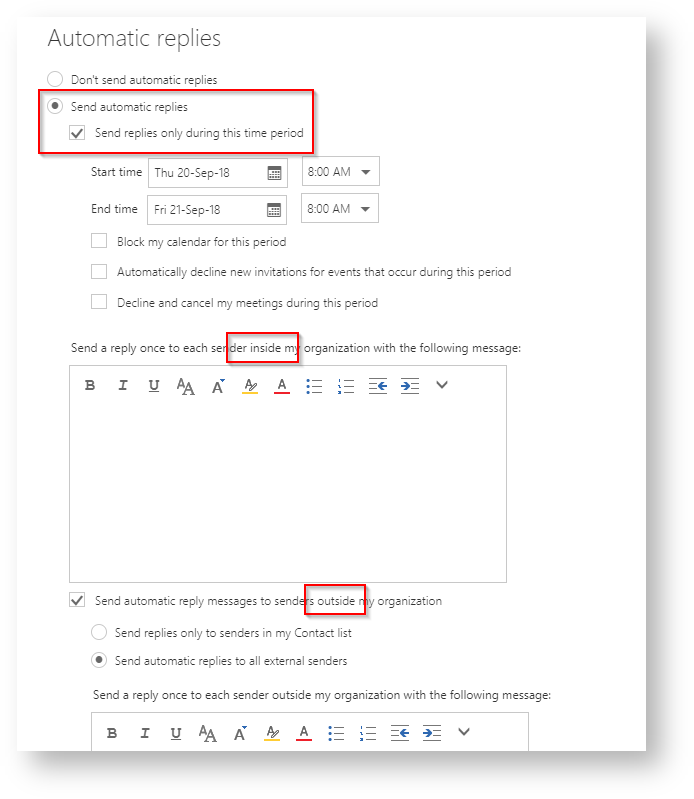
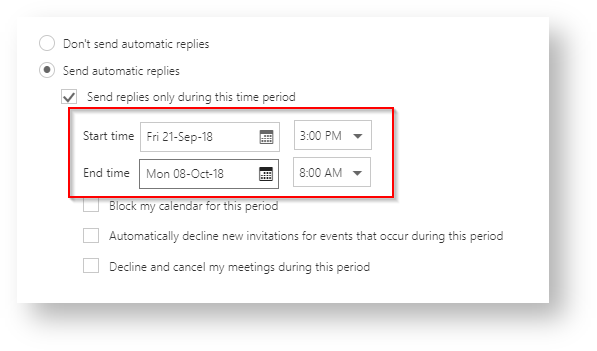
- Make sure you select 'Send automatic replies' and 'Send replies only during this time period' for both the inside and the outside auto replies.
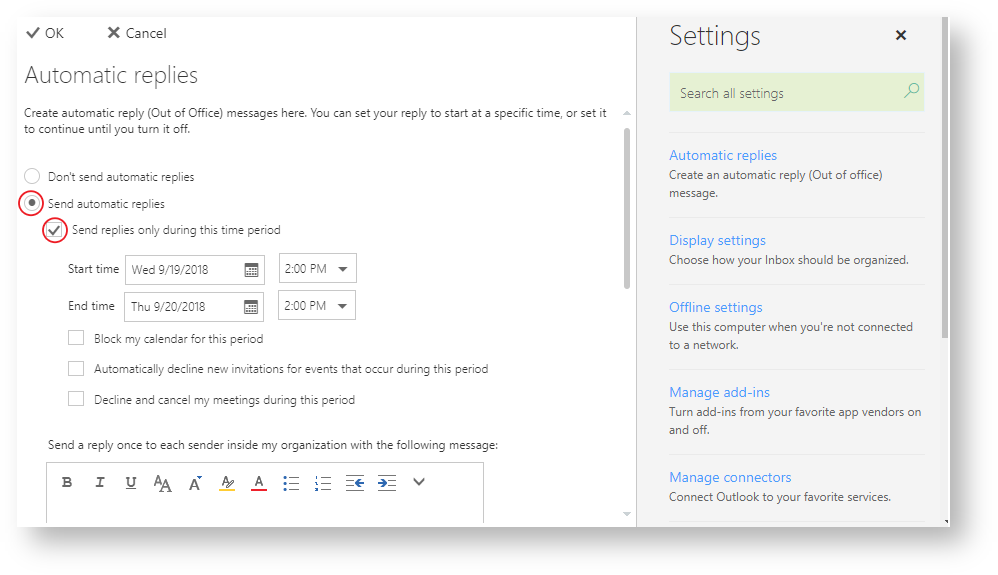
- The start time should be set to your last day (and hour) of work and the end time should be set to your first day back.
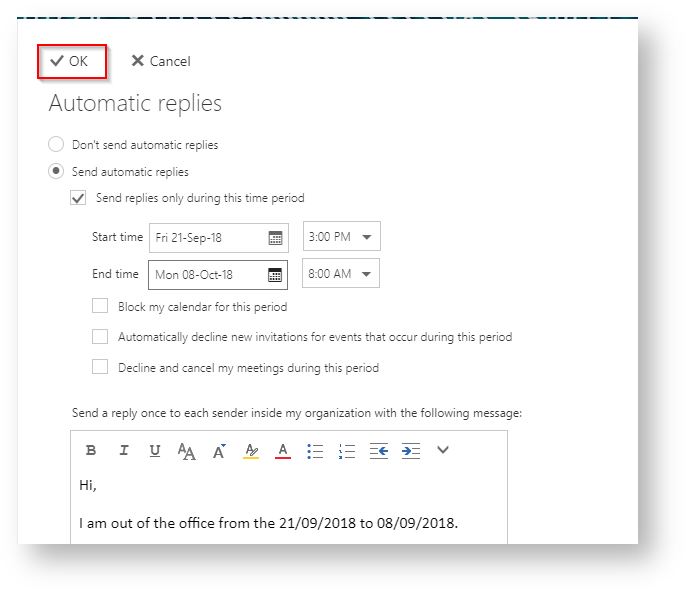
- Next fill out the message boxes with the message you would like to be sent back. This can be different in both sections. This message should contain the day you left as well as your first day back to let the person know you are unable to attend to their email until that date.
- Finally hit the 'OK' button in the top right to save your automatic reply
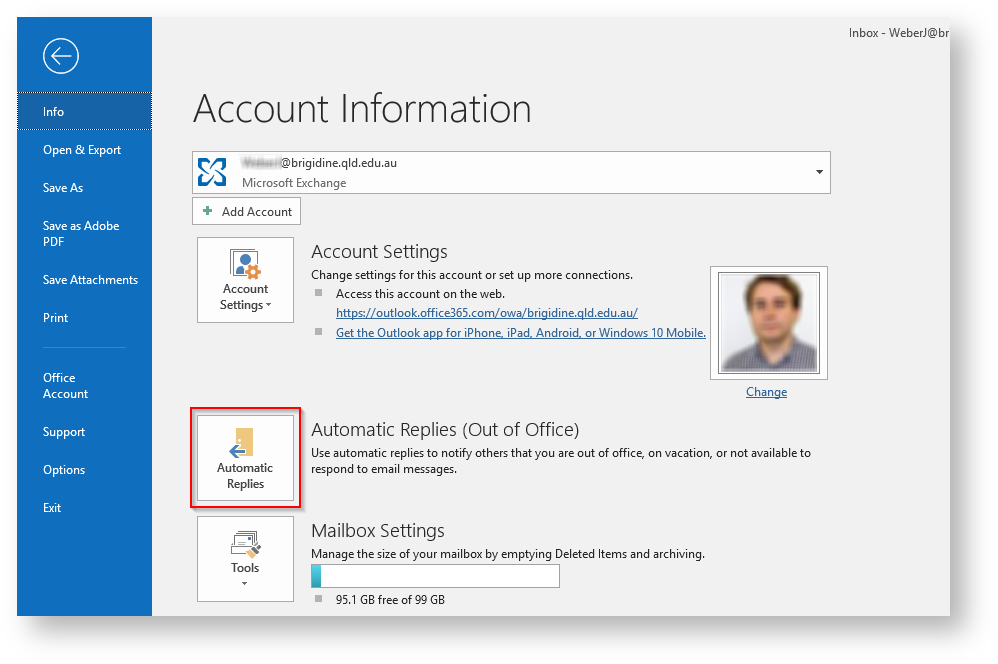
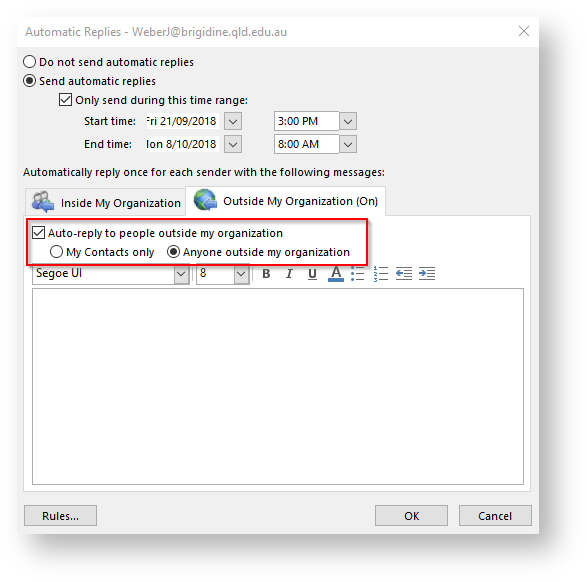
- In the Outlook App, click 'File' in the top left corner.
- In the info tab, click on 'Automatic Replies'
- Choose 'Send automatic replies and check 'Only send during this time range'. The 'Start time' should be your last day (and hour) of work and the 'End time' should be set to your first day back.
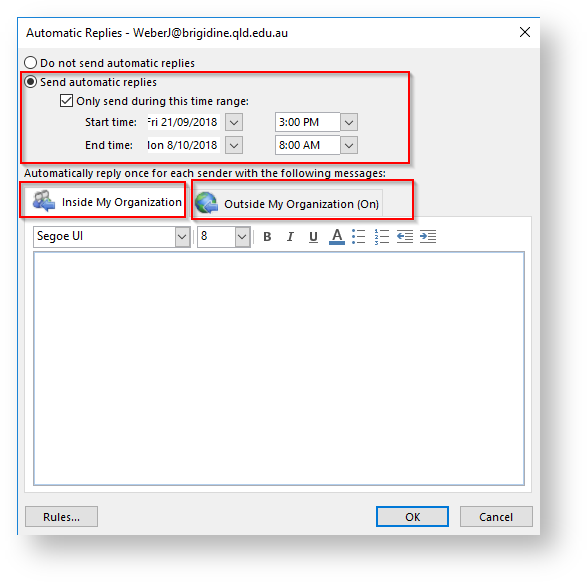
- A message should be written for 'Inside My Organization' and 'Outside My Organization (On)' if you usually receive emails from external people. This can be done by clicking the different tabs. The defaults should be left in the 'Outside My Organization (On)' as shown below.
- Write your message in both sections. This message should contain the day you leave as well as your first day back to let the person know you are unable to attend to their email until that date.
- Once you have written the messages select 'OK' to save the changes.